So, I made a chalkboard for my son. You see, my son loves the chalkboard wall at my Aunt's house. I had been seeing a ton of DIY chalkboards on Pinterest but never realized how easy it was. Until today...
While walking back from getting some lunch with my little one, I became creatively spontaneous. Sherwin-Williams was on our way home & I pulled my son inside. "Do you have chalkboard paint or magnetic paint?" , I asked the guy at the counter. He gave me a deer in the headlights look. How are you going to work at Scherwin-Williams and give me that blank stare? After a few slow gazes around the room, he finally spotted chalkboard paint. Only 6.99?! I'll take it! I also asked what kind of brush to use and he, with another employee, gave me this one. I took the smallest one because I hadn't even bought my frame yet. Please do not be like me and pay 9 bucks for a brush for this simple project. I went to Big Lots minutes later to find the same brush for $1.50. So this $20 dollar project turned into a $30 project because of my expensive brush.
We made one last stop at the thrift store and I chose the largest glass picture frame in the store. Was around 8 bucks, which really isn't that bad. I saw a few wooden frames and mirrors that I want to try out the next time. But for this craft, its directly for my son so he doesn't care what kind of trim his frame has :) He just wants drawing room.
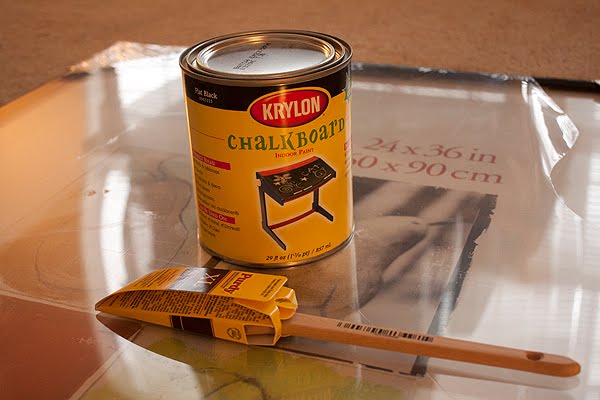
Once I got home, I took the frame apart and cleaned the glass really well with Windex. Oh, I must mention that the Krylon Chalkboard paint I got did specify that it was usable on glass. If you're planning on using the glass in the picture frames, get a chalkboard spray or paint that specifies it can be used on that item.
When it dried, I laid down a bunch of newspaper pages because, lord forbid, I get this paint on the carpet. I also opened up the doors and windows and turned on a small fan. While the paint did say low odor, I wanted to take precautions. Then I got to work.

I just made strokes all across the glass. This process took me about 20-30 minutes. The longest part was waiting for it to dry.

Which took hours. On the can it said it would dry much quicker but mine did not. I think it was fully dry in 4 hours, however, I applied another coat of paint on it after that. The next morning, it was dry and ready to be used. Before you use your chalkboard, you need to prime it with chalk. I took a piece of white chalk and made lines straight across to get a nice white background. Then I erased it. Now, it looked like a chalkboard! On the internet, people like to use chalkboard spray because they are worried about seeing the brush strokes. I'll be honest, you could see them slightly when it was dried BUT after you prime the chalkboard with chalk, you absolutely cannot see them at all.

And there you have it! A chalkboard from a cheap picture frame! Yes, we still have our Christmas tree up. We're lazy crazy. I plan to hang the picture frame on his wall somewhere but for now, he can just draw on the floor. He likes doing that anyway ;) When he gets tired of drawing, he just plays Halo or Minecraft on the Xbox. Then he comes back to the chalkboard to draw zombies. Boys will be boys!


No comments :
Post a Comment